There are so many things about your writing career you can’t control, but there’s one big one that you can—your author photo. As soon as you declare yourself a writer, you’ll get asked for it. You’ll upload it to your author website. You’ll splash it across your social media platforms. It’ll be printed on your book cover, your Amazon and Goodreads author pages, your blog posts, and your press releases. It’ll even pop up when you leave a comment on someone else’s article online or you attend a virtual workshop. So how do you make sure your author photo is doing its job?
First be honest with yourself about two fundamental questions:
- Who is the audience for your photo? Don’t forget it’s not just your readers, although they’re certainly your primary target. It’s also the conference organizer evaluating your workshop proposal, the agent or publisher deciding whether to sign you, the podcaster who could book you as a guest host. It’s the influencer you’ve asked for a blub, the bookstagrammer you’ve asked for a review, and the fellow writer considering you for an author panel.
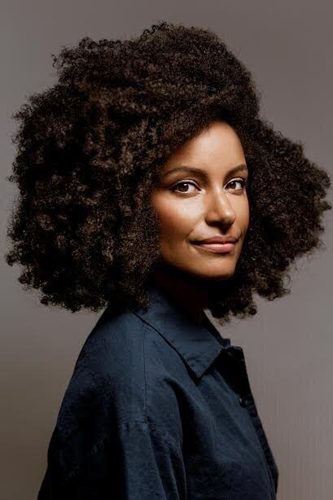
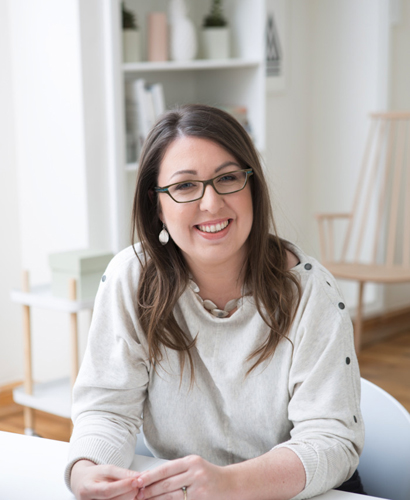
- What is your author brand? In other words, how do you position yourself in the marketplace? This is based partly on your individual personality and characteristics (extrovert or introvert; younger vs. older, homebody vs. world traveler) and partly on the genre and style of what you write. The ex-cop writing thrillers, the humorous women’s fiction writer, the upbeat author of popular YA novels, and the debut writer of topical literary fiction (left to right below) will opt for different author photos based not only on their innate personas but also the type of reader their books appeal to. Your author photo tells a story, even though it’s non-verbal. What story do you want to communicate?

Michael Connelly 
Ann Garvin 
John Green 
Kiley Reid
Next steps:
- Do your homework before the shoot. Google “author photos” and read articles with tips by people in the industry. Look through Pinterest boards and the author pages of writers in your genre on Goodreads and Amazon. Download images that appeal to you and put them in a word document to share with your photographer so they get a feel for what you’re after. This will involve making some basic decisions: do you want an outdoor or an indoor shot? A full body picture or just a head shot? What type of clothing will you wear and do you want to change outfits during the shoot? What about hairstyle, jewelry, makeup, and props? Practice hand and head positions ahead of time in the mirror or using the camera on your phone to see what’s pleasing to you but also feels natural. You want to be relaxed during the shoot, not uptight and anxious because you’re contorting yourself into an unfamiliar or uncomfortable position.
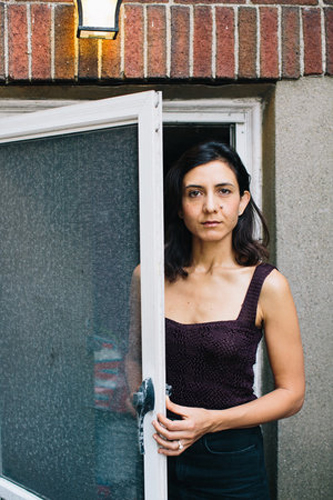
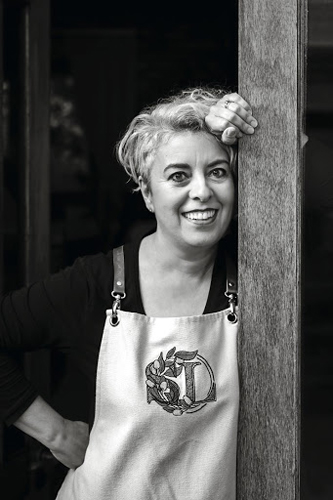
Examples: On the left, two different author photos, each using a doorway as a framing device but reflecting totally different vibes. Moshfegh’s is a somber, serious tone, bordering on depressing and lonely, totally in sync with her unique writer’s voice; Lindop’s has a casual, friendly feel, befitting her brand as a lifestyle cookbook author. Likewise, the two photos on the right use bookcases as a back-drop: Ruth Ware’s setting, for my money, is much too light and open for someone who writes dark, twisty mysteries whereas Jennifer Weiner’s leaning bookcase subtly conveys her somewhat off-kilter writing style.

Otessa Moshfegh 
Sophia Lindop 
Jennifer Weiner 
Ruth Ware
- Hire a professional—It’s not as expensive as you might think (I spent $375 and got 140 jpegs to choose from). As writers, we hire developmental editors, book designers, and publicity agents. Why would the image you present to the world for the next five years be any different? To find someone you’re comfortable with in your community, ask your fellow writers who they used and what they paid; then call the top three referrals, talk to them on the phone, and send them the pictures of what you have in mind. Agree up front on costs, setting, number of shots, and who will own the copyright (my photographer gave me rights to everything for one flat fee which also included a makeup and hair styling session). A professional will have the studio set up when you arrive complete with various backdrops, appropriate lighting, and possible props and will be experienced at coaxing the best look out of you. Follow their directions—that’s what you hired them for.
Best tip I got: Capture a moment in your head—a person, an image, a pleasant memory, a bodily sensation. Turn away from the camera, then flip back around with that image in your head to capture a real-life expression. The shot I eventually picked was one where I did this trick. If you look at my author photo below in my bio, I think you’ll find it looks like I’ve got a secret I’m itching to share. That’s what you’re after—a photo where your personality shines through and makes you look like a real live human being, not just a brand.
A Few Don’ts to Keep in Mind:
- Stick to neutral colors (no patterns) and simple backgrounds
- Don’t try to get cute with funny expressions; ditto on new hairstyles, funny props or full-body shots if you don’t feel totally comfortable with your body
- It’s a photo of you and just you—not your book, not your family, not your pet, not your European vacation. And definitely not you twenty years ago. That said, once you get famous, feel free to include anything you want in your photo like these two well-known authors who obviously love their animals and think you will, too.


Lisa Jewell 
James Lee Burke 


Thanks for the thorough approach to author salesmanship through their image.
Rich Peter